How I Successfully Removed a Google Penalty
- Traffic
- Leads
- Revenue
- Week 1: Learning the Site’s History and Tracking Changes
- Week 2: Major Site Cleanup, External Link Removal
- Week 3: Corrected Issues Found in Week 2 and Started to Tackle Backlinks
- Week 4-6: Backlink Cleanup, Structure Data Issues and Citation Work
- Week 7-8: Penalty Recovery and Rankings Restored
- What to Check When Doing a Penalty Audit
- Conduct a link audit
- Find broken links
- Find redirect issues
- Find site errors
- Review page titles
- Review meta data
- Find duplicate pages
- Annotations allow me to quickly see what major updates correlate with the site’s drop in traffic.
- To determine which of the site’s issues were caused during major updates.
- Canonical URLs
- Duplicate content of the main page
- Number of pages crawled
- Number of 301s
- Number of 404s
- Number of other errors
- Number of pages for each section of the site (blog, main pages, pillar content, etc.)
- Number of pages without meta details
- Number of index/noindex pages
- Etc.
- Create a summary page
- Pull data from export
- Track progress
- Broken third-party links
- Branded homepage links (many overused)
- Fake security badges
- Were created more than two months ago
- Had less than 10 visitors in the past year
- Generating unnecessary links
- Generating unnecessary code
- Generated massive amounts of code
- Served little purpose to the site
- LinkResearchTools
- Link Detox
- Deceptive
- Inaccurate
- Untruthful
- http-non-www
- http-www
- https-non-www
- https-www
- All on-site issues corrected
- Loading speeds increased by at least 50%
- Structured data cleaned up
- Redirects in place
- Backlink profile
- Broken links
- Broken site code
- Citations
- CMS plugins
- Content audit
- Duplicate pages
- External links
- Firewall settings
- Redirect issues
- Site errors
- Site speed
- Social profile links
- Structured data
- Unused subdomains
- Code Audit
Google penalties can leave website owners feeling stranded and losing a lot of money. One website owner came to me for help after learning that their site wasn’t even ranking for its own brand name. The site, an industry leader with a 10-year old domain, was under an algorithmic penalty.
The site was ranking well until 2015 when traffic started to decline.
You know the story: they hired multiple SEO agencies over the years, these agencies exported SEMRush reports, and the site’s traffic remained low. When the they hired an SEO Agency or so-called “Google Penalty Removal Agency”, they hoped to get the penalty removed. These guys worked on the site for six months with no success.
A company this big relies on a healthy stream of traffic and leads to their site. Six months is a lot of lost:
So, they came to me for help. It took eight weeks of work, but luckily I was able to remove the penalty and get the site’s traffic back to previous levels.
The steps I took are steps that every site owner can take to recover from a Google penalty.
Jump to Each Week to See What I Did
Tools I Used During the Penalty Recovery
Tools help automate some of the tasks and keep me organized during the recovery process. Since the site had over 50,000 pages at the start, I definitely needed a few tools to help me make sense of the site, its backlink portfolio and to provide a good foundation for a penalty recovery.
The tools I relied on the most were:
Week 1: Learning the Site’s History and Tracking Changes
Every site has a past, and with a ten-year-old site, it’s easy for common issues to go overlooked. A broken link or redirect issue may be noted by one team member and never be corrected. I decided to build a foundation for the site and make sure that the site’s main issues were corrected first.
I took seven main steps during the first week.
1. Crawl the Site with Screaming Frog
Screaming Frog takes a lot of the manual work out of the equation. I decided to run the program to:
The free version works fine for sites with less than 500 URLs, but there is a paid version with a lot of extras, including crawl customization, AMP crawling and validation, and other options that are not available on the free version.
You can find most of the main issues that I’ll be talking about with the free version, if your site is small.

2. Added Search Engine Updates as Annotations in Google Analytics
Google pushes a lot of updates and algorithmic changes to hold their position as the top search engine. What I wanted to do was find a way to add all of these updates into Google Analytics so that I had a clearer picture of what happened to the site’s traffic and when.
Search Engine Watch has a great article on how to add annotations and all of the search engine updates to Google Analytics.
The reasons I did this was:
By being able to visualize the site’s traffic, it was a lot easier to make update-specific changes to the site in an effort to remove the site’s penalty.
3. Track My Own Actions in Annotations
It’s easy to forget every step that you take to correct a penalty. I wanted to have a clear way to know which actions I took and when. I decided to track all of my own actions through annotations to have a strong history of the steps were taken to remove the Google Penalty.
4. Identified Broken Site Code
When looking through Screaming Frog, I noticed that there were a lot of pagination issues for all of the site’s URLs, especially in the blog section. I discovered that each “new” page had issues with:
For example, /page/ and /page/12 would have the same content. There was broken code that was producing this issue, so I tracked it down.
5. Corrected Broken Site Code
I was able to correct the issue by fixing the broken coding, but you may need to hire someone to do this part for you. Even after I fixed the broken code, I found that there were thousands of these pages still indexed in Google search.
These pages should drop off eventually.
If these URLs have a common prefix, you can use the Google Search Console’s “Remove all URLs with this prefix” feature:

6. Updated All Broken Links
With the pagination issue corrected, I decided to open up Screaming Frog again and update all of the broken links that were found. Some links were removed, and some were updated.
Every time I ran a crawl, I used Excel to load in all the data and compare to the previous version of the site. My report page logged and showed me a number of issues, including but not limited to:
7. Updated All 301 Redirects
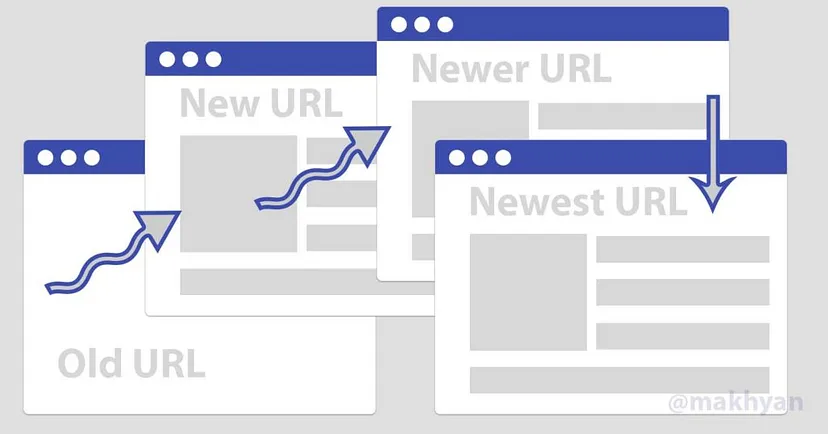
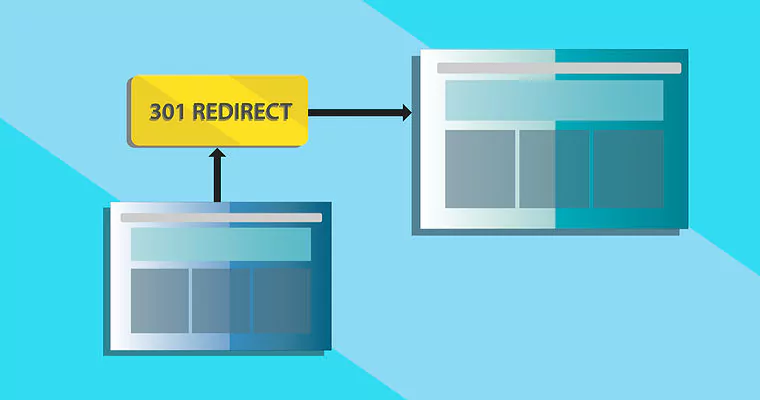
The final step that I took was to update all of the 301 redirects on the site to make sure that they worked properly and went to the appropriate pages. You’ll have to look through your .htaccess files or use a plugin (depending on your CMS) to make all of these updates.
After I performed all of these tasks, I decided to run Screaming Frog again to make sure that there were no issues that I missed. If you find any issues that you missed, we’ll go through an additional stage in week two to correct these.
Week 2: Major Site Cleanup, External Link Removal
Week two, I sat down and went through the site even further. Each step in this week’s removal process is rather straight forward.
1. Removed Unused Development Subdomains
Developers often create subdomains to test a site and any updates to the site or coding before pushing the changes to the live server. I found a few subdomains that were left behind by the developer.
The subdomains were all indexed by Google, potentially causing duplicated content issues.
I decided to remove all of these subdomains and started the deindexation process on search engines.
2. Cleaned Up More Broken Links and 301 Redirects
The unnatural links and redirects that needed to be corrected after the first week’s work were corrected this week. When you have a major site with over 50,000 pages, you may not be able to fix all broken links or redirects in a week.
3. Action Tracking and Screaming Frog Progress
I ran Screaming Frog every day. I would also:
I wanted to be able to track my progress, so I made sure to run Screaming Frog to make sure I fixed any major errors along the way. I also used Excel to track each action I was taking so that I had a clear way to identify everything I did.
My initial crawl of the site had 50,000 pages, and during week two, we were down to 2,000 pages (remember the pagination issue). I still had quite a few pages to remove at this point, so I continued correcting any duplicate or unnecessary pages on the site.
4. Cleaned Up the Site’s External Links
The site had a lot of external links, and a lot of links needed to be removed. I went through each page on the site to remove any of the following external links that didn’t make sense:
I left all of the external links on the site that made sense, but I made sure to remove any links that no longer made sense to have on the site.
5. Conducted a Full Content Audit
I conducted a full content audit that I would use in subsequent weeks to further clean up the site. Screaming Frog already provides you with a list of all of your content, so you can use this list for your audit.
Export the results of the list to CSV or XLS, and then start to analyze your pages.
You’ll want to make note of pages that have very thin content or pages that no longer make sense for the domain to publish. You can easily do this in Excel and use it in week three.
6. Site Speed and Lighthouse Reports
Google wants sites to be snappy, and if they’re not, it will impact rankings and user experience. I ran the site through PageSpeed Insights and created LightHouse reports so that I could better understand the site’s overall speed.
You’ll find that both of these tools will provide you with insights and suggestions to improve your site’s speed. You can also integrate Google’s PageSpeed Insights API with Screaming Frog.
Work on your site’s speed until your reports are sufficient.
7. Removed Firewall Blocks Blocking Google Bot IP’s
While going through the site, I noticed that WordPress and Cloudflare both manually blocked some of Googlebot IP addresses. I removed all of these firewall blocks to ensure that all of Google’s crawlers could properly crawl the site.
You can run a reverse DNS on the IPs, or you can follow a general Googlebot IP address list to find any IPs you may be blocking that belong to Google.
Week 3: Corrected Issues Found in Week 2 and Started to Tackle Backlinks
I did a lot of preliminary work in the first two weeks and started to get a feel for the site I was working on. A lot of key issues were corrected, and I did a lot of the groundwork for the weeks to come.
The third week is where I started to correct a lot of the issues I already knew existed on the site from last week’s research.
1. Removed Low-Quality Pages and Pages with Little Traffic
The content audit from last week allowed me to remove all of the thin, low-quality pages on the site. I removed all of these pages and also removed any pages that:
I went through each page on the site and removed all of these low-quality pages one by one.
But I also looked at all of the pages I was going to remove to find any pages that had valuable backlinks. I used Ahrefs for this so that I could leverage some of this link value in the next step.
2. Removed Additional Broken Links
Removing pages on the site caused a few broken links to pop up. I ran Screaming Frog to correct all of these broken links that were linking to the pages in the first step of week three.
3. 301 Redirected Removed Pages That Had Valuable Links
I removed a lot of pages from the site, but a lot of these pages still had considerable backlinks to them. I decided to 301 redirect these pages to maintain some of these valuable backlinks.
Remember, don’t just 301 everything to the homepage, always do the redirect to related content or related pages.
4. CMS Cleanup
The site was using WordPress, but the site you may be working on could use any other CMS. What I did was look at the theme and found that it was:
I noted all of these generation issues and also removed any plugins that:
Plugins can slow down a site drastically, and removing them helped clean up a lot of code and speed issues.
5. Correct Site Speed Issues
Lighthouse provides in-depth information that I passed along to the development team to correct. The team followed all of the recommendations from Lighthouse to speed up the site considerably.
6. Time to Tackle Backlinks
Backlinks are always going to be a major focal point when trying to recover from a penalty. I decided that it was time to dig into the backlinks that the site had because I was going to be working on them extensively in the coming weeks.
I used two main tools to help me:
When using both of these tools, it will be quick and easy to find backlinks that are toxic to your site.
I downloaded the disavowed links file, which had over 2,000 links listed. I started to look into all of the URLs individually to learn more about the links that were disavowed and potential links that I would add to the list in the coming weeks.
7. Deleted Pages That May Get the Site Considered as YMYL
Google’s EAT and YMYL really allows us to better understand how Google distinguishes between high-quality and low-quality content. YMYL stands for: Your Money or Your Life.
YMYL was a major issue when I decided to look through historical pages on the site.
I noticed that many of these pages mentioned specific drugs, and I was very worried that these pages may be considered YMYL.
The backlinks to the site also had a lot of links from controlled substances pages, so I asked the company if they still deal with these substances. Since they no longer dealt with the substances, it was safe to delete all of the pages that may fall in the scope of YMYL.
Essentially, some of these pages and the links to them may have been seen as:
I knew that the coming weeks would include a lot less groundwork, and a lot of steps to really try and lift the penalty off of this client’s site.
Week 4-6: Backlink Cleanup, Structure Data Issues and Citation Work
Over the next few weeks, I decided it was time to work on backlink cleanup. I had been adding URLs to the disavow, but I noted that there wasn’t any recovery as a result. I was trying to recover anything at this point, but the site didn’t even budge for branded keywords, such as “company name.”
Facebook, Glassdoor and Yelp, along with a few other popular sites, started to dominate the search results, pushing the website’s rankings down even further.
A lot of the work done during these few weeks included:
1. Tedious Backlink Cleanup and Disavow File Updates
I initially removed the disavow file, but I found that the site’s rankings dropped a few positions. When the site’s rankings started to fall, I uploaded the disavow file again and started the time-intensive backlink cleanup.
I went through all of the sites, added any sites that were toxic and updated the disavow file.
Every few days, I would upload an updated disavow file. Combing through all of the backlinks took up a lot of time, but it was an important part of the entire process. A lot of sites that were once authority sites were now toxic.
2. Structured Data Issues Fixes
Structured data helps Google display your website with search appearance elements. Google has a really good introduction to structured data if you’ve never heard of it before.
When you use structured data properly, it helps organize and optimize your website. Search engines will “read” this data and display it accordingly. For example, a lot of recipe sites will use this structured data to have richer snippets on Google that include ingredients, pictures, ratings and other useful information.
I found that the site had a lot of issues with structure data.
I went through the site to correct these issues. With the structured data cleaned up, I was confident that the site would have “richer” displays in the search results.
3. Citation and Social Profile Updates
The site had a lot of citation links and social profiles that linked to their site. Some of these links pointed to the non-www version of the site and some linked to the “http” version rather than the “https” version.
I wanted to eliminate the unnecessary load on the server from the 301 redirects that these links caused.
What I did was make sure that all of these citations and social profile links were linking to the site’s “https://www” version of the site.
Week 7-8: Penalty Recovery and Rankings Restored
Google has a lot more resources and processing power than I have at my disposal. When I was going through my tedious backlink checking tasks, I realized that Google already knows that these sites are toxic.
I decided to delete all of the disavow files and trust that Google knew what backlinks were toxic already.
The site had four main properties:
I removed the disavow file from all four of these properties and let Google take care of the rest.
When I first started to clean up the website, it had over 50,000 pages. A lot of these pages were created with erroneous pagination code. Some pages had thin content or content that simply didn’t make sense for the site to have any longer.
The page total after the entire site cleanup was 400-500 pages, with:
LinkDetox is a tool I relied on heavily to find good and bad links in my disavow files and in the site’s backlink portfolio. When I removed the disavow files, I needed Google to check all of these backlinks again and really allow Google to evaluate the backlinks on its own.
Link Detox Boost® really helped in this case because it helps sites recover from Google penalties faster. The disavow only works when Googlebot recrawls the links to a site. The Boost tool nudges Googlebot to check out these links again and value links that actually make sense.
After a few days, Google re-indexed pages and started its own evaluation of the backlinks.
It took about a week before the site finally reappeared in the search results for its own brand name. The site was in position two in the search results, and a day later, was in position one for its own brand name.
The penalty was finally lifted.
Mobile results took a few additional days to catch up to the regular search results, but they eventually did catch up.
Google was happy. I was happy. The client was happy, and started to recover to traffic levels they hadn’t experienced in years.
What to Check When Doing a Penalty Audit
When performing my penalty audit, I had a long list of items that needed to be checked. If you’re performing a penalty audit, I recommend following my penalty audit checklist below:
Manual Penalties
If you know you website received a manual penalty then you should check the reason in Google Search Console, fix the issues and communicate the updates back to Google Search Quality Team for further review. Submit a reconsideration request when you have fixed the issues.